This quick install guide for installing Windows Server 2019 evaluation edition on a KVM / QEMU hypervisor using the CLI.
The CLI interface is vital for my KVM install because my lab computer is headless server. So feel free to use virt-manager to install if you like.
This guide assumes you have all of the necessary packages for KVM / QEMU are installed. If not please see this post
Step 1:
Download a copy of the Windows Server 2019 ISO file from the Microsoft Website. (you can use any email and phone number combo.) I used something similar to 0@1.1 for email and 10123456789 for my phone number
Step 2:
Create the Windows Server 2019 Virtual Machine
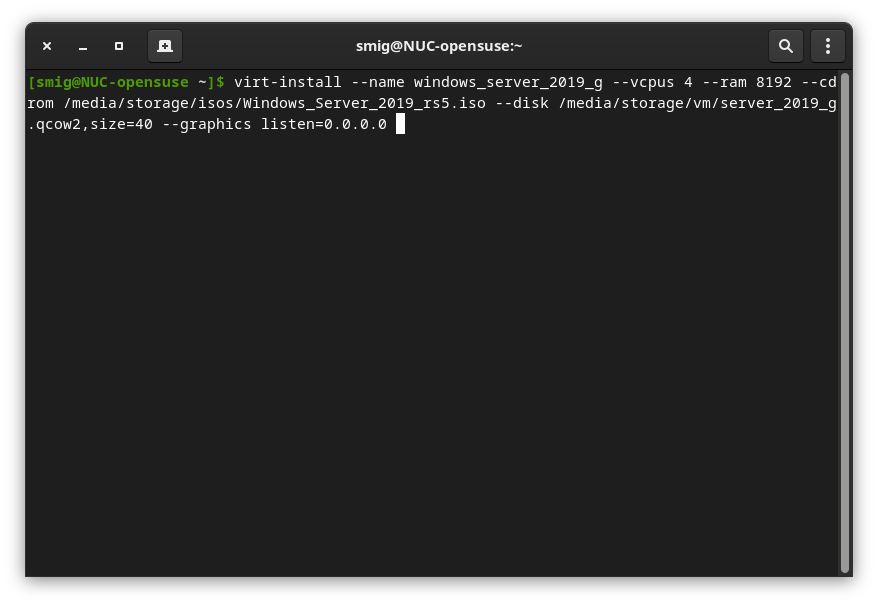
Command Breakdown:
virt-install --name <name of vm> --vcpus <number of cpus for vm> --ram <memory amount in mb> --cdrom <iso file location> --disk <options for virtual hard disk> --graphics <listen to 0.0.0.0>
(note about listen to 0.0.0.0 do not use in production environments. Not secure. However it’s useful in my lab environment so that I can remote in without using a ssh tunnel)
Step 3:
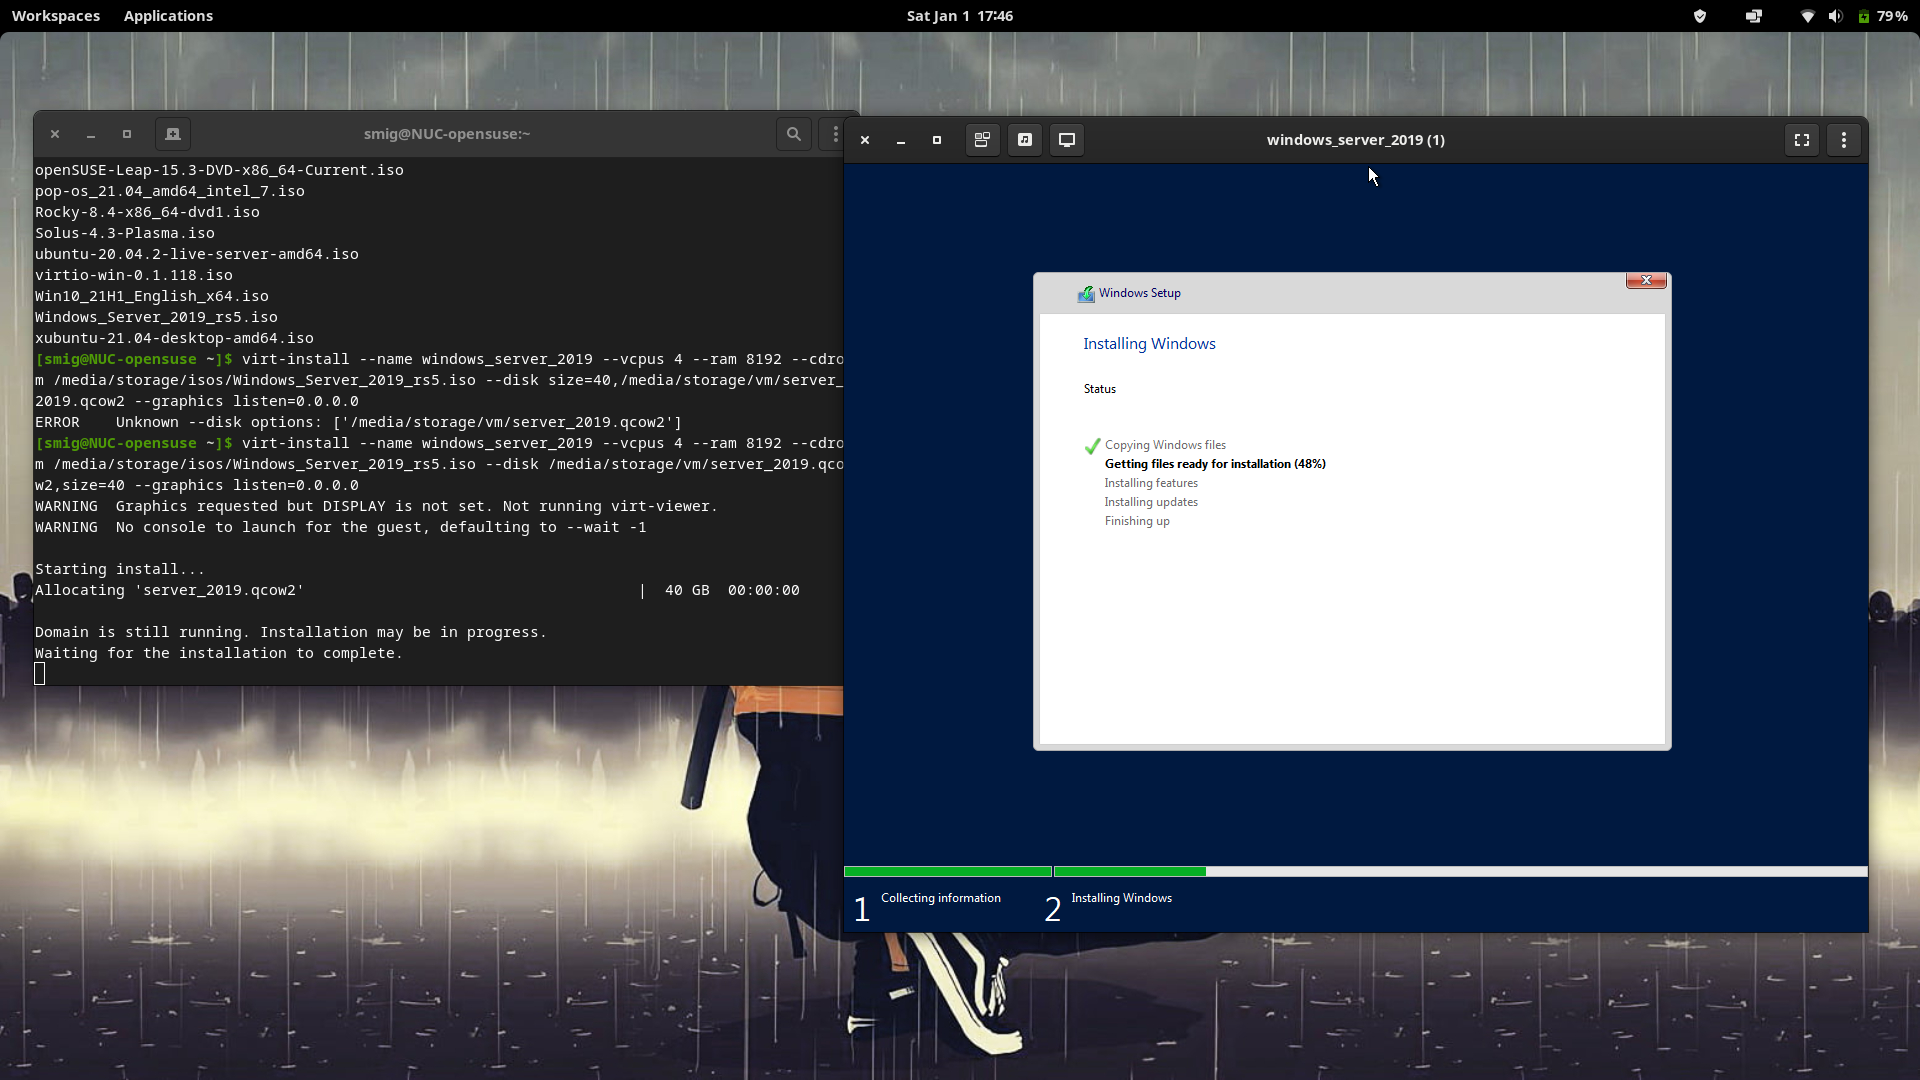
Go through the usual installation steps to install Window Server 2019. The Virtual Machine will reboot once the installation is finished.
Step 4:
Install the missing drivers by mounting the virtio drivers .iso disk to your VM. (Download ISO Here)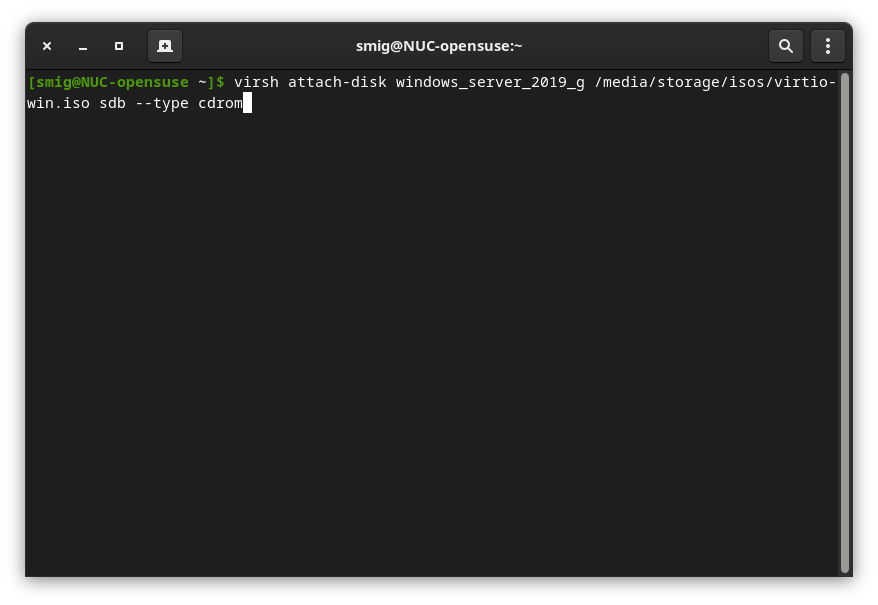
Command Breakdown:
virsh attach-disk <name of vm> <file path for virtio iso file> <vm device name> --type cdrom
Next open the computer management console on the Windows Server 2019 VM.
You should devices with yellow caution badges. Install the drivers for those by updating the driver and using the cdrom drive as the search location.
Step 5:
Edit the VM’s CPU Information for improved performance.
virsh edit <vm name>
Edit the CPU informtaion in the XML file to reflect the correct setup. For example my setup above has 4 vcpus. So it’s reflecrted below.
  <cpu mode='host-model' check='partial'>
    <topology sockets='1' dies='1' cores='2' threads='2'/>
  </cpu>
Sockets = 1 (Only change if you have more than one cpu) Cores = 2 (Edit to the amount of cores your virtual machine will use) Threads = 2 (Edit to the amount of Threads per core)
And there you have it. You have a working Server 2019 virtual machine to play around with.
Hope this quick guide helps!